Once you have created a booking calendar, the next step is to deploy it so you can enable customers to easily schedule time with you.
There are multiple ways of deploying your booking calendar: Embedding a standalone booking calendar on your website or on a OnceHub page, or by pairing it with a chatbot or routing form and publishing those.
Embed your booking calendar in a OnceHub page
You can embed your booking calendar in a standalone OnceHub page, which you can then share with your customers. This approach works well if you don't need to screen your customers with any qualifying questions.
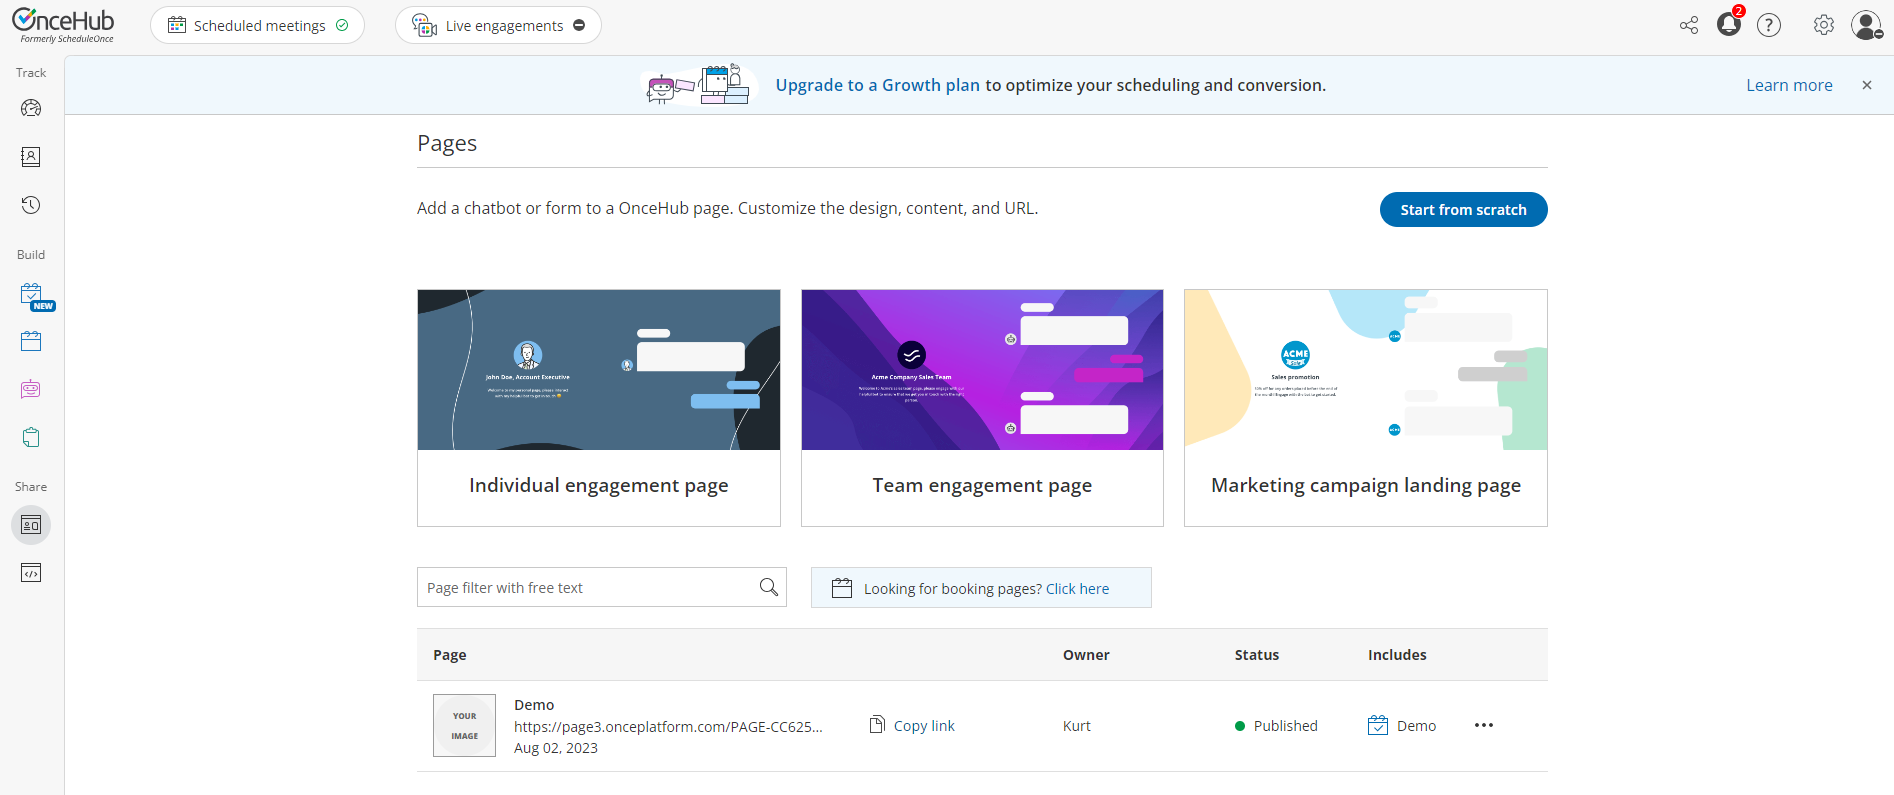 Figure 1: The pages home screen
Note
If you do need to screen and route customers, then the chatbots or routing forms sections below will serve your needs better.
To do this, you will first need to create a page. Click on the pages icon on the left-hand toolbar, under the heading "Share". (Figure 2)
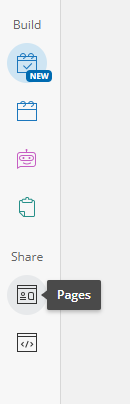 Figure 2: The location of the pages icon
- In the pages lobby, you will see three preset page designs, or the option to Start from scratch with your own design.
- Hovering your mouse over the preset pages brings up some text which explains the strengths of each page, and should help you decide which page to proceed with.
- You can also Preview each page, which loads it in a new tab with some preview text.
Learn how to create a new Page from scratch.
Add a booking calendar to a page
- To add a booking calendar to a page, select a preset page, or create one from scratch.
- On the right-hand menu, under the heading Interaction type, select booking calendar.
- On the dropdown menu, select the booking calendar you would like to embed in your Page.
- Click Save and Share your page at the bottom of the menu to create your new Page. Anyone who you share this Page with will see a display of the booking calendar, and be able to use it to schedule time with you.
Another sharing method is to use the Share tab. The Share tab is available when configuring a booking calendar. Open the booking calendar you would like to share, and click the Share tab on the top panel, next to booking settings and Questions. This will also allow you to copy a link to the booking calendar shared on a Page.
Another method of sharing your booking calendar is to click on the three dots to the right of your booking calendar in the lobby, and then click Share with link. This will allow you to copy a link to your booking calendar and share it. It is recommended to use this method just for personal testing purposes, as the calendar will be viewed on a non-customizable platform. The optimal method of sharing a booking calendar with customers is by embedding it in a personalized Page.
Embed your booking calendar in a website
Depending on which pricing plan you have with OnceHub, you can embed your booking calendar in your website, providing an easy way for customers to book with you on your own page.
Website embedding is available to both types of OnceHub users, although member users can only embed booking calendars of which they are the sole host, whereas admins can embed any booking calendar on their account.
Your booking calendar's color palette is customizable, meaning that the color of the buttons and background of your booking calendar can be changed to fit the theme of your website.
To share your booking calendar by embedding it into a website, follow these steps:
- Open the booking calendar which you would like to share.
- From the top menu, click the Share button.
- Click Design and get the code.
- Select the color you'd like the booking calendar to be, and then click Get the code.
- Paste the code into the relevant section on your website.
Now your booking calendar is embedded, and your customers can schedule time with you directly from your website.
Use chatbots for scheduling
One method of deploying your booking calendar is by pairing it with a chatbot.
Open or create a chatbot, and on the right-hand menu titled Add interaction, scroll down to the actions heading, where you will see Booking calendar. Clicking this will add the booking calendar to your chatbot.
Using a chatbot with your booking calendar allows you to route your customers more effectively by asking qualifying questions, and directing them to the relevant calendar. You can add multiple booking calendars to a chatbot, to enable more accurate routing in one spot.
Learn how to create and route chatbots.
Use routing forms for scheduling
One method of deploying your booking calendar is by pairing it with a routing form.
Open or create a routing form, and on the right-hand menu titled Add interaction, scroll down to the actions heading, where you will see Booking calendar. Clicking this will add the booking calendar to your routing form.
Using a routing form with your booking calendar allows you to route your customers more effectively by asking qualifying questions, and directing them to the relevant calendar. You can add multiple booking calendars to a routing form, to enable more accurate routing in one spot.
Learn how to create and route routing forms.